Amazon EC2 Complete Guide
Let’s discuss the key concept and scope of Amazon EC2 in the following sequence. Calculating the exact requirement of computing power for your need is almost impossible. One may underestimate the usage of servers, leading to application crashes or sometimes wastage of servers resources by overestimating.
What is AWS EC2?
Amazon Elastic Compute Cloud (EC2) is a web-oriented service from Amazon that provides adjustable cloud compute services. Depending upon your computing requirements, you can easily increase or decrease the computing capacity depending on the application requirement.
Virtual servers used for running applications on Amazon’s EC2 are referred to as instances. Amazon EC2 helps you to set up and configure the applications and operating systems that run on your instance. You can get started with Amazon EC2 using the AWS free tier when you sign up for AWS.
Why Choose AWS EC2?
Independent developers who buy servers based on the estimated computing power have to look for everyday security patch updates apart from troubleshooting problems at the back-end level and so on.
Thanks to an EC2 instance, you will never have to worry about such things as it will all be managed by Amazon. You just need to pay attention to your application, and that too at a reasonable cost.
How to run Systems in AWS EC2?
- Select AWS EC2 after logging into your AWS account
- Choose Launch instance under create instance
- Select an AMI (Amazon Machine Image) – templates of OS that provide the required information to launch an instance.
To launch an instance we have to specify the AMI type, it could be Windows, Ubuntu server etc.
- AMIs could be configured or preconfigured according to your requirements.
- Select pre-configured AMI from the AWS marketplace.
- Go to quick-start and select one for setting up your own.
- During the configuration process, you will reach a point where you have to select an EBS (Elastic Block Storage) option which is a persistent block-level storage volume used with EC.
Different types of EC2 Computing instances
AWS EC2 offers 5 types of instances for various computing needs, which are as follows.
General Instances
They are suitable for applications that require a balance of performance and cost. This is a good choice if you are new to cloud computing or aws, since this instance type offers a wide balance of computing power, memory, and storage
Eg: Email responding systems, where you need a cost-effective and quick response and do not involve much processing
Compute Optimized Instances
This type of instance is suitable for applications that require a lot of CPU processing. These types of instances are suited for batch processing workloads, media transcoding, high-performance web servers, high-performance computing (HPC), scientific modeling, dedicated gaming servers, ad server engines, machine learning inference, and other compute-intensive applications.
Memory-Optimized Instances
Memory-optimized instances are suited for applications that require fast performance for workloads that process large data sets in memory. These types of instances are used in real-time big data analysis.
Storage Optimized Instances
These types of instances are used for applications that require high, sequential read and write access to very large data sets. The I/O performance for these type of instances are very impressive.
Accelerated computing instances
Accelerated computing instances use hardware accelerators like Graphics Processing Units (or GPUs), or co-processors, to get performance. These types of instances are used in Machine learning, high-performance computing, computational fluid dynamics, computational finance, seismic analysis, speech recognition, autonomous vehicles, and drug discovery.
AWS EC2 Instance Creation
Now let’s learn about the steps involved in AWS EC2 instance creation by taking the use case of an Ubuntu instance in a test environment.
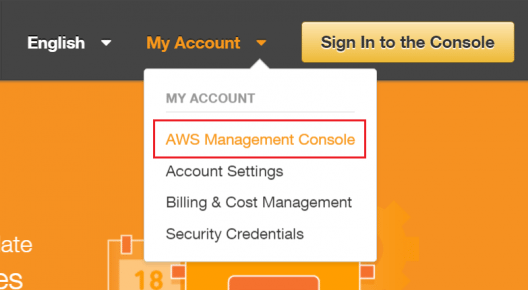
- Login to AWS Management Console.

- Select your Preferred Region: from the drop-down menu based on the criteria mentioned earlier.
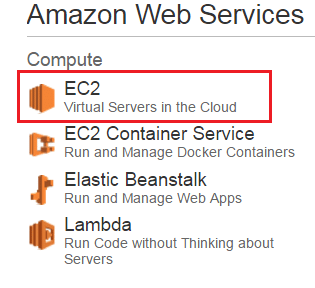
- Select EC2 Service: Choose EC2 under compute section, which will take you to EC2 dashboard.

- Click Launch Instance
- Select an AMI: Select 64-bit Ubuntu AMI because you require a Linux Choose an Instance

Step 2: select instance type.
Choose t2.micro instance (Free Tier eligible)

- Step 3: Configure Instance Details.
After configuring all the details and click on add storage
- Step4:Add Storage

- Step 5:Tag an Instance
Enter a suitable name for your AWS EC2 instance in the value box. This name is referred to as tag, which will appear in the console when the instance gets launched.
- Step6: Review and launch an instance
Your Ubuntu instance will be launched successfully
Conclusion
You need to analyze your application resource usage with the help of a monitoring tool and analyze it before choosing the instance type. If your application is simple and you are looking for cloud computing, then you can go with the general-purpose instances. If your application is high availability and requires more processing powers, then you can opt for the CPU-optimized or memory-optimized instances.
You can do this analysis with the help of an experienced server administrator, who is good in AWS management. We Nixtree will help you to design your aws infrastructure based on your application needs.
