tar command in Linux
Let’s discuss the section on how to archive files and directories into a compressed file using the tar command and extract the contents of an existing archive.
Tar command – Introduction
Archiving and compressing files are useful for backups and transferring data across a network. one of the oldest and most common commands for creating and working with backup archives is the tar command.
With this command, users can gather large sets of files into a single archive file. The archive can be compressed using gzip, bzip2, or xz compression. The compressed file can extract to the individual files.
This command can list the contents of the archive or extract their files to the current system.
tar [OPERATION_AND_OPTIONS] [ARCHIVE_NAME] [FILE_NAME(s)]tar options
tar command options are divided into their operations. The table below shows common options and their description.
| OPTIONS | DESCRIPTION |
| -c, –create | Create a new archive. |
| -x, –extract | Extract from an existing archive. |
| -t, – -list | List the table of contents of an archive. |
| -v, –verbose | Verbose shows which files get archived or extracted. |
| -f, – -file= | Filename. This option must be followed by the file name of the archive to use or create. |
| -p, – -preserve-permissions | Preserve is the permissions of files and directories when extracting an archive, without subtracting the umask |
| -z, – -gziP | Use gzip compression (.tar.gz) |
| -j, -bzip2 | Use bzip2 compression(.tar.bz2).bzip2 typically achieves a better compression ratio than gzip |
| -J, –xz | Use xz compression(.tar.xz). The xz compression typically achieves a better compression ratio than bzip2 |
Some Practical Examples
Archiving files and directories
The first option to use when creating a new archive is the c option, followed by the f potion, then a single space, then the file name of the archive to be created and finally the list of files and directories that should get added to the archive. The archive is created in the current directory unless specified otherwise.
Before creating a tar archive, verify that there is no other archive in the directory with the same name as the new archive to be created. The tar command overwrites an existing archive without warning.
The following command creates an archive named archive.tar with the contents of file1, file2, and file3 in the user’s home directory.
[user@host ~]$ tar -cf archive.tar file1 file2 file3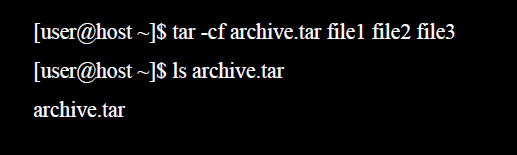
The above tar command can also be executed using the long version options
[user@host ~]$ tar --file=archive.tar --create filel file2 file3Listing contents of an archive
The t option directs tar to list the contents of the archive file. Use the f option with the name of the archive to be queried. For example;

Extracting files from an archive
A tar archive should usually be extracted in an empty directory to ensure it does not overwrite any existing files. The root extracts an archive, the command preserves the original user and group ownership of the files. If a regular user extracts files using tar, the ownership of the belongs to the user extracting the files from the archive.
To extract a tar archive, use the –extract (-x) option followed by the archive name:
$ tar -xf archive.tarIt will also be extracted from the files using the command the -v option to print the names of the files
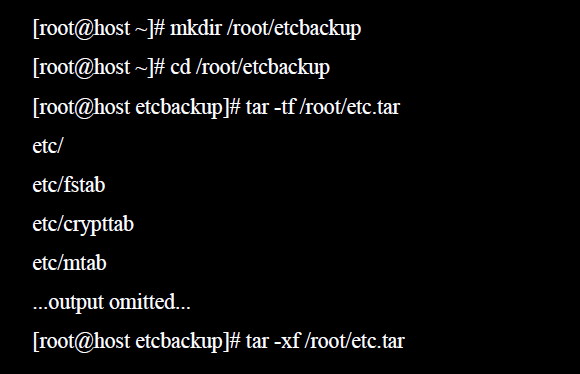
$ tar -xvf archive.tarTo restore files from the /root/etc.tar archive to the /root/etcbackup directory, run:
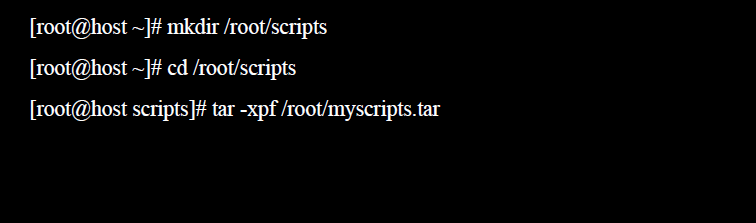
By default, when files get extracted from an archive the umask is subtracted from the permission of archive content. To preserve the permissions of an archived file, the p option when extracting an archive.
In this example, an archive named /root/myscripts.tar is extracted in the /root/scripts directory while preserving the permissions of the extracted files;
Creating a compressed archive
The tar command supports three compression methods. There are three different compression methods supported by this command.
- The gzip compression is the fastest and oldest one and it is most widely available across distribution and even across platforms.
- bzip2 compression creates smaller archive files compared to gzip but is less widely available than gzip.
- The xz compression method is relatively new, but usually offers the best compression ratio of the methods available.
To create a gzip compressed archive named /root/etcbackup.tar.gz with the contents from the /etc directory.
[root@host ~]# tar -czf /root/etcbackup.tar.gz /etcTo create a bzip2 compressed archive named /root/logbackup.tar.bz2 with the contents from the /var/log directory.
[root@host ~]# tar -cjf /root/logbackup.tar.bz2 /var/logAlso create a xz compressed archive named, /root/sshconfig.tar.xz, with the contents from the /etc/ssh directory.
[root@host ~]# tar -cJf /root/sshconfig.tar.xz /etc/sshVerify the content of an archive using the tf options:-
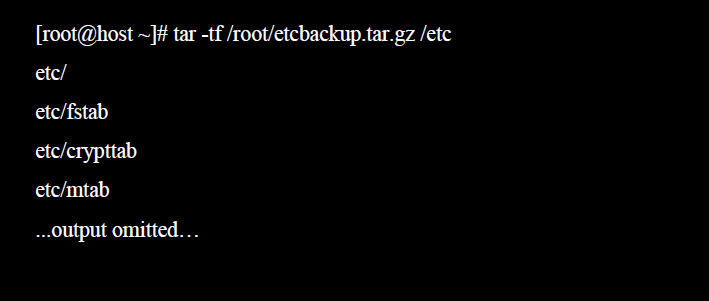
For example, to list the content archived in the /root/etcbackup.tar.gz file, which uses the gzip compression. use the following command:
Extracting a compressed archive
Extracting a compressed tar archive is to determine where the archived files should be extracted to, then create and change to the target directory. The command determines which compression was used and it is usually not necessary to use the same compression option used when creating the archive. It is valid to add the decompression method to the command. If one chooses to do so, the correct decompression type option must be used, otherwise tar yields an error about the decompression type specified in the options not matching the file’s decompression type.
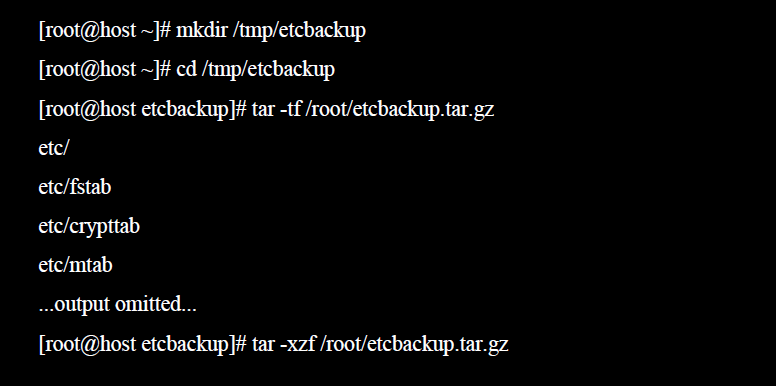
$ tar -xzf backup.tar.gzTo extract the contents of a gzip compressed archive named /root/etcbackup.tar.gz in the /tmp/etcbackup directory:
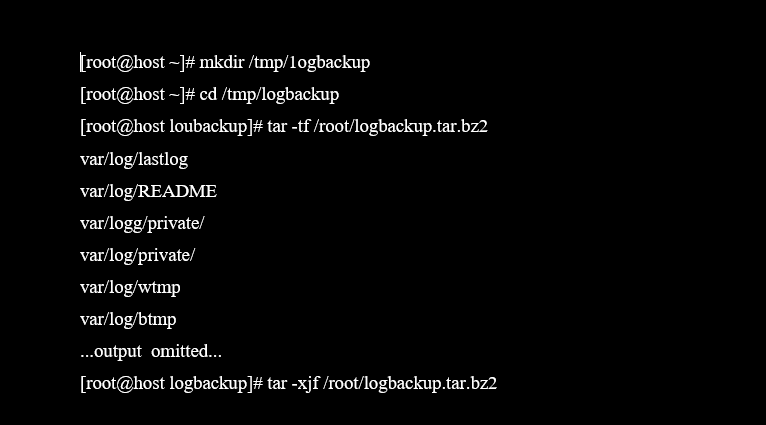
To extract the contents of a bzip2 compressed archive named /root/logbackup.tar.bz2 in the /tmp/logbackup directory:
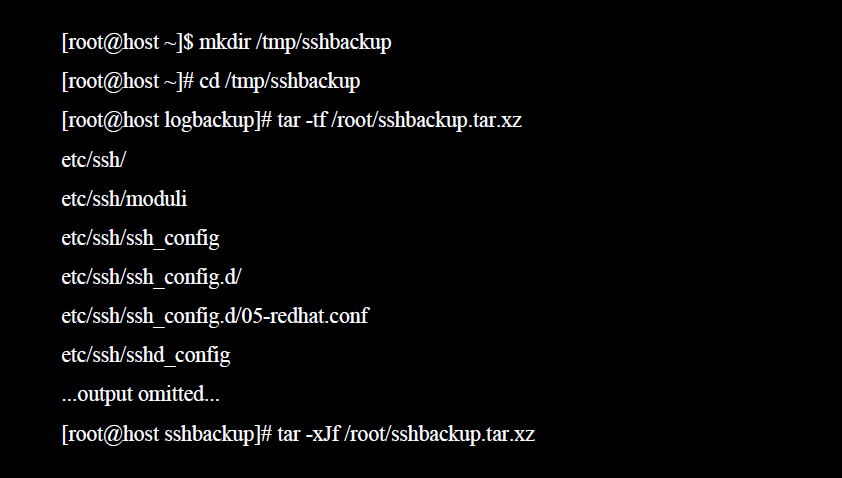
Also extract the contents of a xz compressed archive named /root/sshbackup.tar.xz in the /tmp/sshbackup directory:
Adding Files to Existing Tar Archive
To add files or directories to an existing archive, use the –append (-r) operation.
For example, to add a file named newfile to archive.tar, you would run:
$ tar -rvf archive.tar newfileCopyRemoving Files from a Tar Archive
Use the –delete operation to remove files from an archive.
The following example shows how to remove the file file1 from archive.tar,
$ tar --delete -f archive.tar file1Find a File in an Archive
There are two ways to locate specific content using tar:
- The -t option to list files in an archive is handy for locating specific files. Add the file name (or names) after the command:
$ tar tf <archive> <file(s)>For example, to locate file50.txt in the files.tar.gz archive, run:

The option requires knowing the possible path to the file.
2. Use the tar together with the grep command to filter the output:
$ tar tf <archive> | grep <file(s)>For example:
![]()
![]()
Find Multiple Files in an Archive
Use the –wildcards option to match multiple file instances. For example:
tar tf files.tar.gz --wildcards file/files5*.txt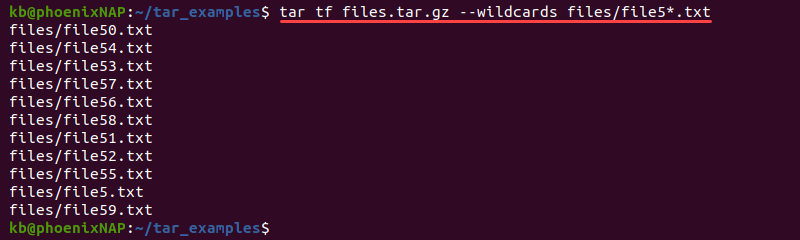
Apply wildcard matching when files have a similar name, or for filtering a certain file type.
Extract Single File from Archive
Avoid extracting the whole archive if you need one or several files.
To get a single file from an archive:
- List the contents and check if the file exists:
tar tf files.tar | grep file100.txtThe output prints the path to the file needed for the next step.
2. Extract the specific file with:
tar xf files.tar files/file100.txt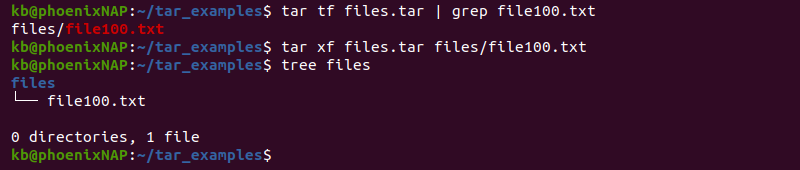
The command creates the directory files with only the indicated file. Follow the same steps to extract a single file from compressed archives by adding the appropriate tag. For example, use the -z option to pull from a tar.gz file.
Delete from Archive
To delete from the archive, locate the file you want to remove, for example:
tar tf files.tar | grep file100.txtThen, remove the file using the –delete a tag:
tar --delete -f files.tar files/file100.txt
The delete option does not work on compressed file formats.
Combine Archives
Use the –concatenate or -A option to combine multiple archives. The basic syntax is:
tar Af <archive to extend> <archive to extend with>As an example, copy the existing files.tar file using the cp command:
cp files.tar files_copy.tarNext, concatenate the two archives:
tar Af files.tar files_copy.tar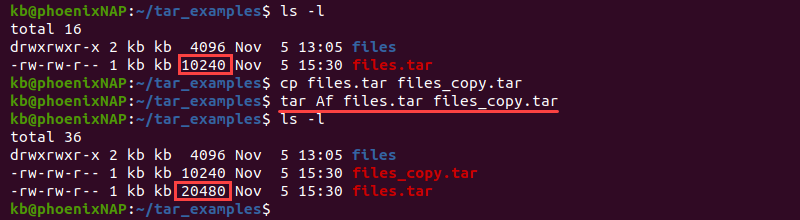
To confirm the concatenation worked, check the file size.
Difference Between Archive and Files
To check the difference between an archive and files on disk, use the -d tag:
tar df <archive name>The command searches for the same contents and compares them to what is in the archive. The option only checks for existing files and ignores any newly added files.
The steps below show how to use the -d, –diff, or –compare tag with tar:
1. Create a tar archive:
tar cf files.tar files2. Compare the archive with the existing directory:
tar df files.tar![]()
![]()
The output does not display anything, meaning there is no difference between the existing files.
Permissions
There are two possible ways to control file permissions with tar when extracting an archive:
1. Preserve original permissions:
tar xf <archive name> --preserve-permissionsThe permissions are as stated in the file before archive creation.
2. Modify the permissions to the default umask value:
tar xf <archive name> --no-same-permissionsThe files take on the default Linux permissions.
File Ownership
Tar allows file ownership configuration. For example, to set the file owner when creating an archive, add the –owner and —group options and provide values for each:
tar cf <archive> <file(s) or location(s)> --owner=<value> --group=<value>The owner value represents the UID (User ID) while the group value is the GID (Group ID). To find these values for a user, run:
id <username>For example, create an archive and set the ownership to root:
tar cf files.tar files --owner=0 --group=0
Tar allows preserving the ownership when extracting from an archive. To do so, add the –same-owner option at the end:
tar xf <archive> --same-ownerWrite to External Program
The –to-command option instructs tar to send each extracted file to the standard output for an external program. The basic syntax is:
tar xf <archive> --to-command='<command>'For example, extract the files.tar contents and pipe the file names as directories:
tar xf files.tar --to-command='mkdir $TAR_FILENAME'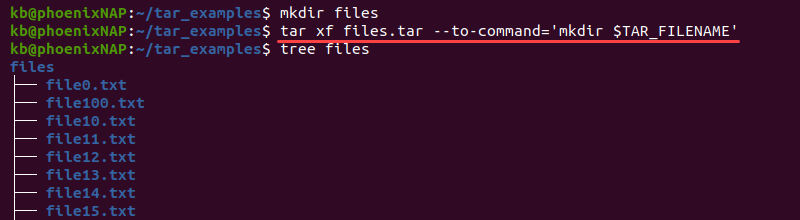
Create Daily Backups
To automate daily backups, create a bash script and add the following lines;
tar czf backup-$(date +%Y%m%d).tar.gz files
find backup* -mtime +1 -delete
The tar command creates a compressed archive, while they find the command seeks backup files older than one day. Change the +1 parameter to +7 for weekly or +31 for monthly backups.
Conclusion
We hope you understood the tar command. This is extremely flexible and there are a ton of options that you can play around with the command in Linux. If you want to explore more of the command options, feel free to use the -help or the man command to view the manual pages of the command. We hope this tutorial has been useful to you and you’re not more comfortable with this command.