Secure your domain with Let’s Encrypt
Introduction
Let’s Encrypt is a new free certificate authority that launched on April 12, 2016 that provides free X.509 certificates for Transport Layer Security (TLS) encryption via an automated process designed to eliminate the current complex process of manual creation.
Advantages:
- Before Let’s Encrypt was made available to webmasters, obtaining a certificate for https meant spending a fair sum of money through trusted CA (certificate authorities) to gain the ability to encrypt traffic for your website.
- Let’s Encrypt has completely changed the process of adding a SSL certificate to your website. Not only have they made access to a certificate completely free, they have also made sure both the installation process and the ability to update your certificate is as simple as possible. This means website owners can offer the benefits of https to their site visitors, without the need to spend extra cash in doing so. Meaning that the traffic going to any website using Let’s Encrypt is, in essence, protected.
- To install and setting up a certificate as simple as possible. On a Linux server, for example, one can rely on the EFF’s Certbot to install a Let’s Encrypt certificate by simply copying and pasting a few lines of code. For installation, simply wget the download and chmod the permissions as prescribed by the Certbot site.
- Then run Certbot using the appropriate option (apache, for example). For those who are concerned about Certbot making sweeping changes to their server configuration, you can also run the tool to manage certificate only mode to make the server changes manually after the installation.
- What really makes using Certbot awesome, is that it provides you with the ability to test out automatic certificate renewal in a testing environment instead of doing so “live!” As an added bonus, Cerbot supports both Apache and Nginx on various Linux distributions.
Disadvantages:
- The biggest problem with Let’s Encrypt is that it democratizes access to https for any website. Yes, on the surface, this should in fact be a positive thing that we’re celebrating. Unfortunately human nature comes into play here. When most people (non-geeks/non-IT) see https, immediate and unwavering trust is implied.
- Even though Let’s Encrypt is merely providing encryption for your website, most people visiting it will give it the same level of trust as websites with the “green bar” https (Extended Domain Validation), which includes the company name next to the padlock in the address bar.
- This means that even though identity isn’t actually verified at the same level as a green bar https website, most site visitors won’t really know the difference. This is terrifying and we should be concerned about this. What most people don’t realize is that a secure connection to an untrustworthy website doesn’t mean it’s safe to use.
- To add further concern, there’s very little preventing malware distributors from using Let’s Encrypt certificates to make malware distribution websites look more official. Not only has it happened already, worse, is the fact that Let’s Encrypt’s stance on this issues quite weak.
- The initiative is putting far too much trust into the general public’s understanding as to how https actually works. Fun fact folks – most people are clueless about tech. And the reality is merely comparing new registrations with Google’s records won’t be enough.
Let’s Encrypt on cPanel server
Let’s Encrypt for cPanel is a cPanel/WHM plugin for the Let’s Encrypt service, which provides our clients with the ability to instantly issue free trusted SSL certificates for all of their hosted domains. The plugin is distributed in RPM form as part of a yum repository for CentOS 6 and 7.
Login as Root SSH access to server
Save our issued licence file as /etc/letsencrypt-cpanel.licence and chmod to 0400.
Add the letsencrypt package repository:
# cd /etc/yum.repos.d/
# wget https://letsencrypt-for-cpanel.com/static/letsencrypt.repo
Install the plugin using yum
# yum install letsencrypt-cpanel
Once the installation completed we will see the “Let’s Encrypt SSL” icon on the home screen of cPanel.
Certificate Installation process is extremely easy in 3 steps
Step 1:Click on Let’s Encrypt SSL icon
![]()
![]()
Step 2: Choose a domain name you want to install ssl for. Choose if you want to use SSL for SMPTS, POP3S, IMAP SSL and www sub domain and click on Issue
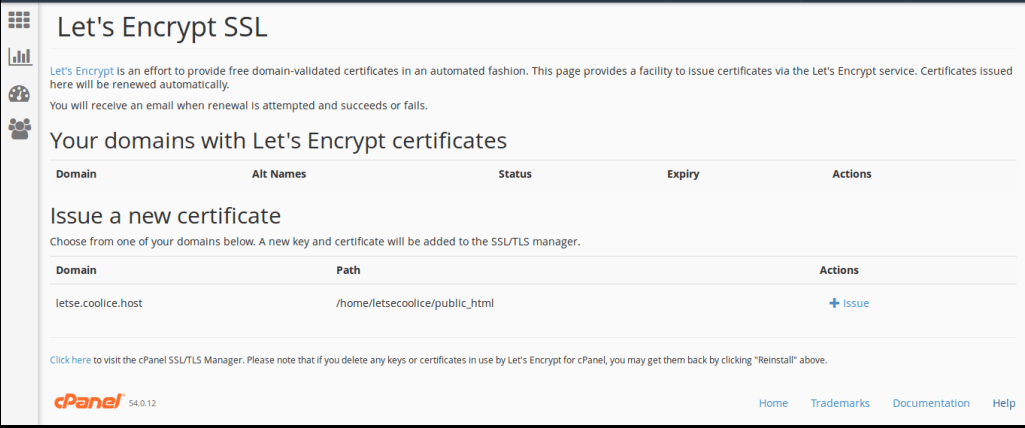
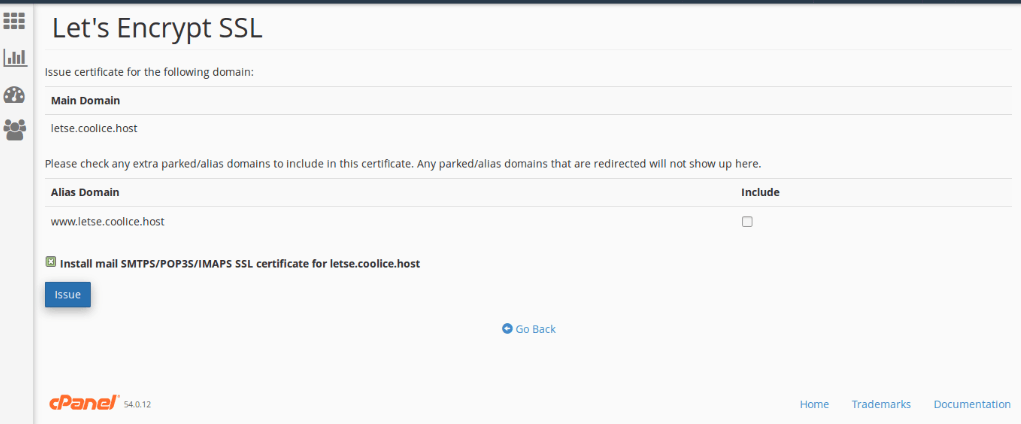
Step 3: Click on ‘issue’ button. Your certificate will auto issue and install for your domain…

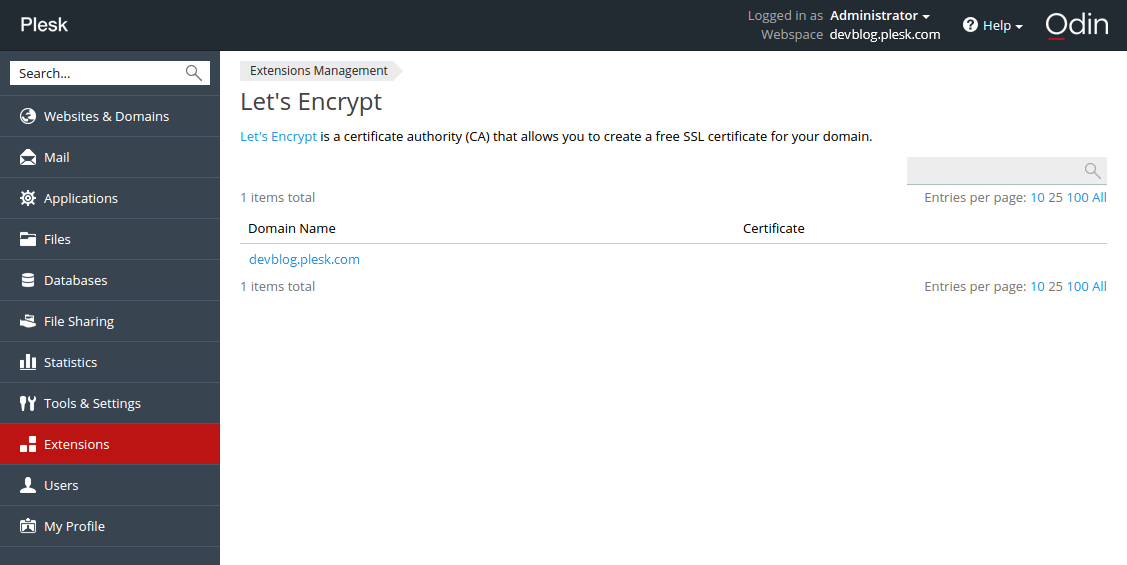
Let’s Encrypt on Plesk server
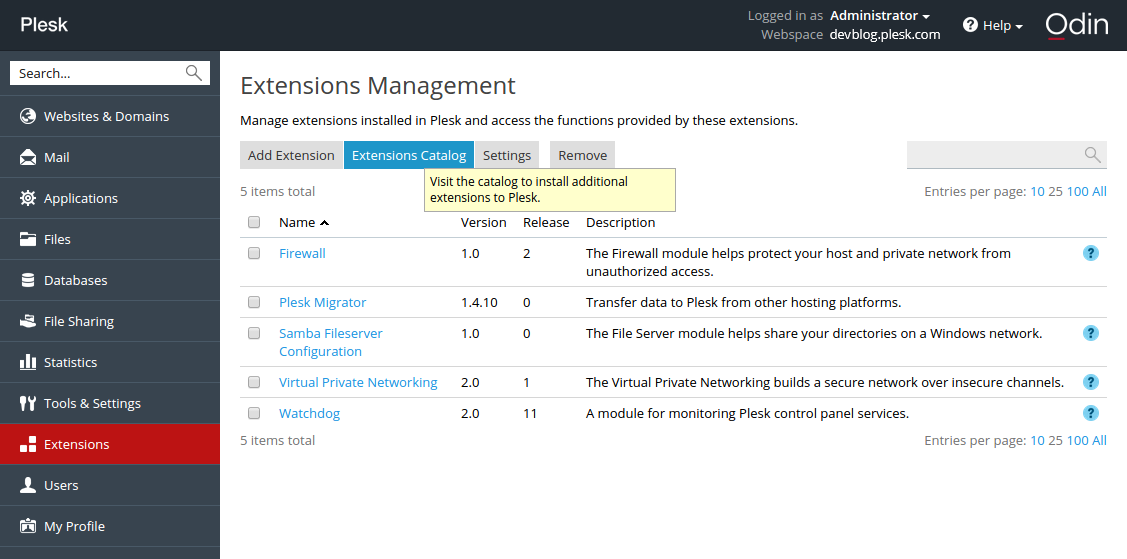
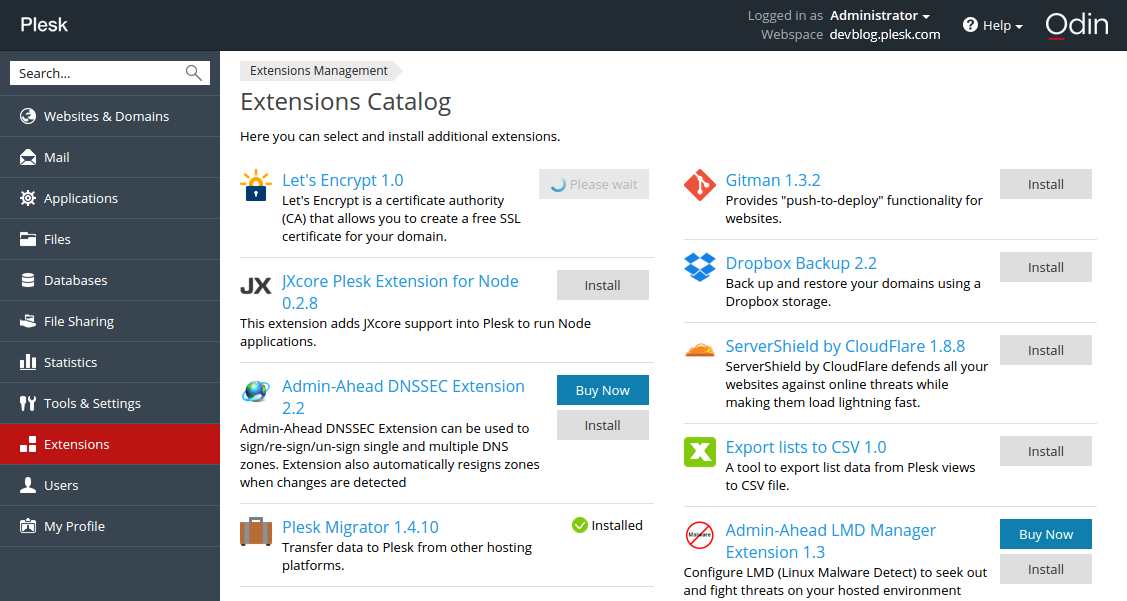
Let’s Encrypt extension is available for Plesk servers.
Log in to Plesk and install the Let’s Encrypt extension via the Extension Catalog:
After the installation, run a shell script . It fetches dependencies (sets up repositories and installs missing packages), creates a virtualenv virtual environment, and installs the Let’s Encrypt console client with the Plesk plugin inside.
Next, click the installed extension, select a website, and install the certificate:
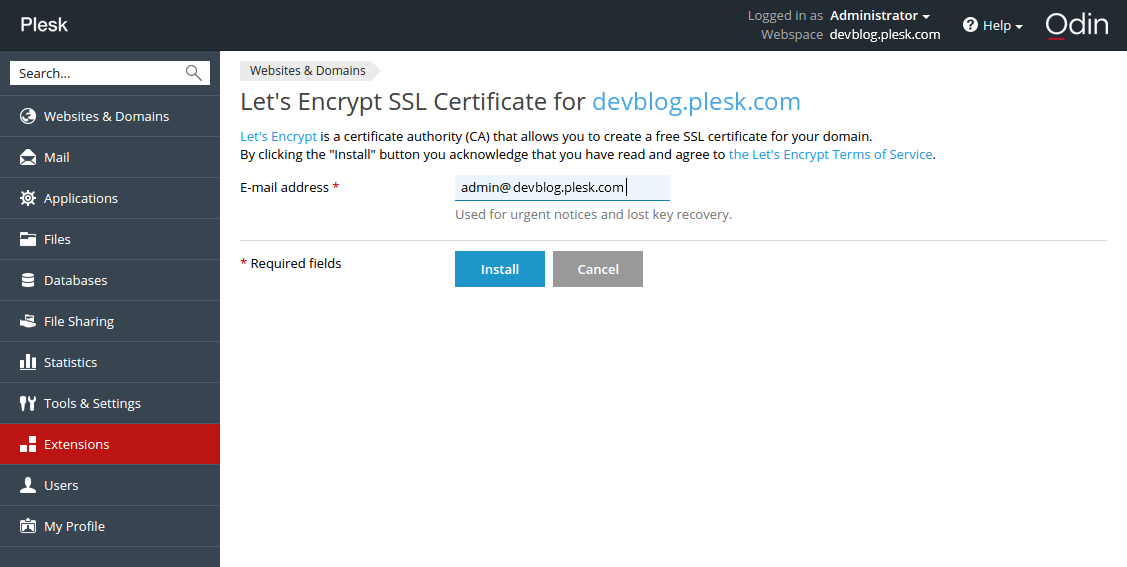
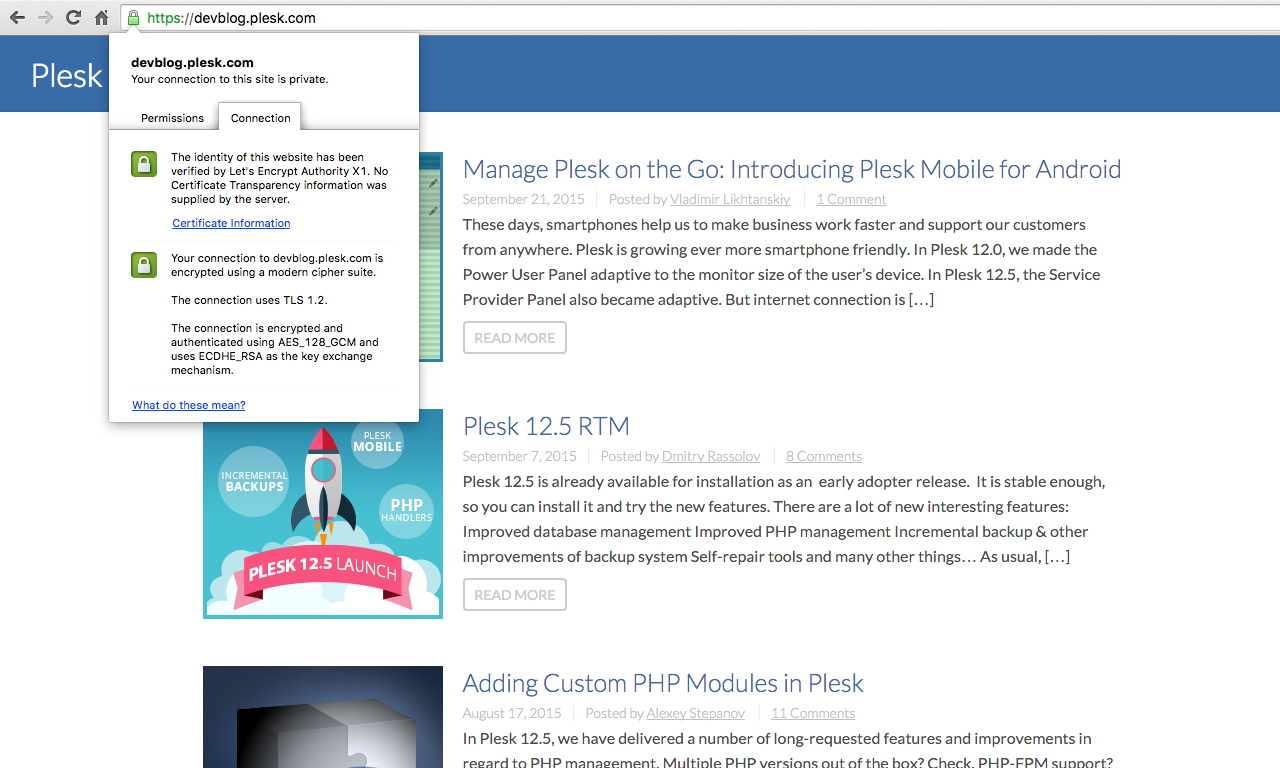
If you have already used the CLI client, you will recognize the interactive mode dialog in this web form. On a “success” message, follow the link
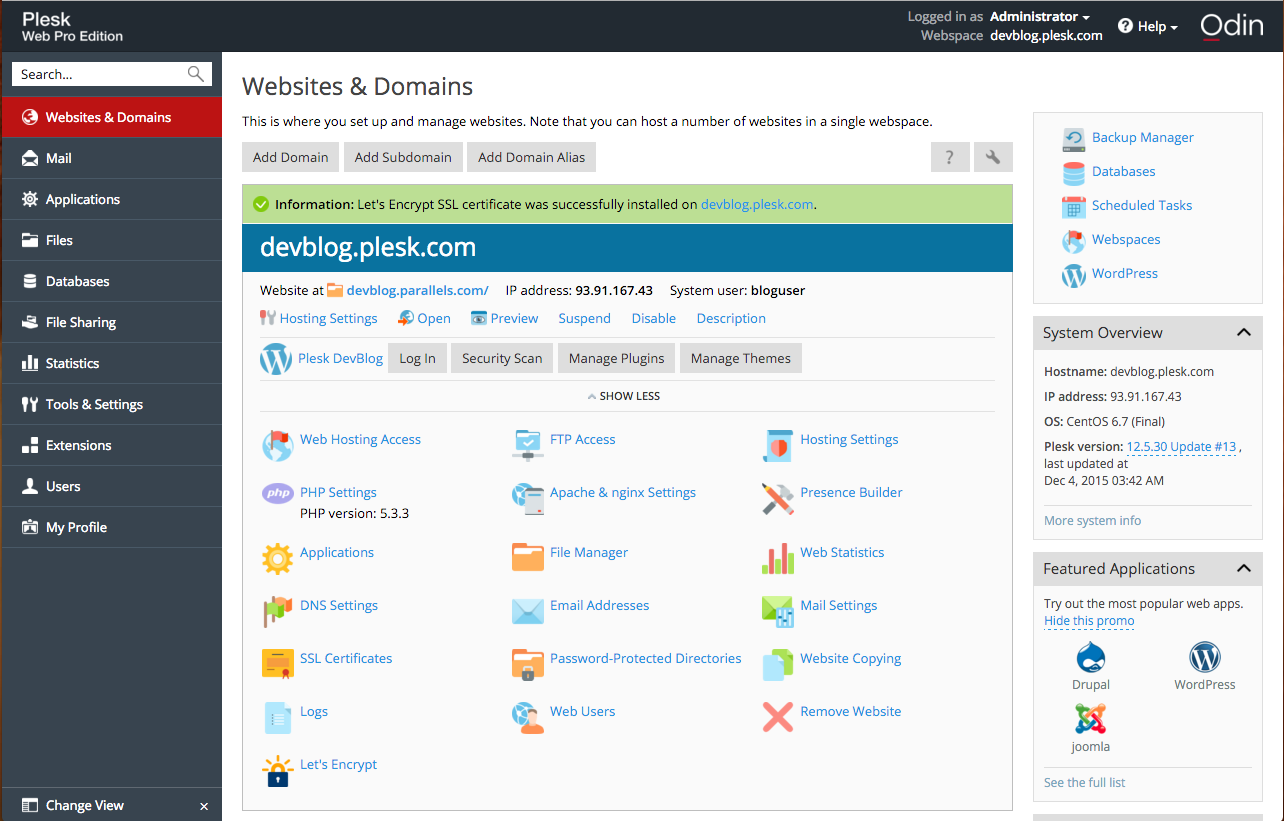
to open the website and see the green “https” icon in the address bar.
Check that the certificate renewal task has been added to Tools & Settings > Scheduled tasks:

Issued certificates are valid for 90 days, but according to the recommendation of the Let’s Encrypt developers, they are renewed on a monthly basis.