Joomla Installation In CentOS 8

INTRODUCTION

Joomla is also spelled Joomla! (with an exclamation mark) and sometimes abbreviated as J!, is a free and open-source content management system (CMS) for publishing web content on websites. Although it’s not as popular as its counterpart WordPress, it’s still used for creating blogs/websites with limited or no web programming knowledge.

It offers thousands of features, plugins, and designs that help you to host several web applications including, discussion forums, photo galleries, e-Commerce, and user communities on the web. It is built on PHP and uses MySQL and MariaDB as database backends. Joomla server provides several high-end templates and most of them are free to use.

LAMP Stack installation in CentOS 8

Install Apache Webserver

First of all, you have to update your repositories, Apache is available in  Centos repositories. So install the package run the following commands:-

$ sudo dnf update

$ sudo dnf install httpd httpd-tools

Once the installation is complete, then enable Apache to auto-start at system boot time using the command below.

$ sudo systemctl enable httpd

Next, start the Apache service by running the command.

$ sudo systemctl start httpd

To confirm is Apache web service is running, run the command.

$ sudo systemctl status httpd

After installing apache, then update the firewall rules to allow requests to web server.

$ sudo firewall-cmd --permanent --zone=public --add-service=http
$ sudo firewall-cmd --permanent --zone=public --add-service=https
$ sudo firewall-cmd --reload

Then you will need to install the LAMP Server including required PHP extensions to your server. So you can install all of them by running the following command:

$ sudo dnf install php-curl php-xml php-zip php-mysqlnd php-intl php-gd php-json php-ldap php-mbstring php-opcache

After installing all the components, start and enable the MariaDB services using the following command:

$ sudo systemctl start mariadb
$ sudo systemctl enable mariadb

Configure Database for Joomla

We will use MariaDB as a database backend. Before creating the database, you will need to secure the MariaDB first. Then you can secure it by running the following command:

Now, create a Database and Database user for our joomla site. To do that first we need to enter the MySQL terminal.

$ sudo mysql_secure_installation

Answer all the questions as shown below to secure the MariaDB

Enter current password for root (enter for none): Just Press Enter
Set root password? [Y/n] Y
Remove anonymous users? [Y/n] Y
Disallow root login remotely? [Y/n] Y
Remove test database and access to it? [Y/n] Y
Reload privilege tables now? [Y/n] Y

Next log in to the MariaDB shell

$ sudo mysql -u root -p

Once you are log in, create a database and user for Joomla with the following command:

$ sudo MariaDB [(none)]> CREATE DATABASE joomla;

After the creation of the database, then can create a user and password using the below query:-


$ sudo MariaDB [(none)]> GRANT ALL ON joomla.* TO 'joomla'@'localhost' IDENTIFIED BY 'password';

Once the user has been created and permissions granted, adjust the user login method to mysql_native_password with the following command. This is to allow joomla to access the database with a username and password combination 

Then, flush the privileges and exit from the MariaDB shell with the following command:

$ sudo MariaDB [(none)]> FLUSH PRIVILEGES;

Now, you have a database and user account. We need to flush the privileges so that the current instance of MySQL knows about the recent changes we have made.

$ sudo MariaDB [(none)]> EXIT;

Exit from the database

Install Joomla on CentOS 8

After creating the database for storing Joomla’s files, and download the latest installation package. At the time of penning down this guide, the latest version is Joomla is 4.0.6. You can download it by running the following command:

$ sudo wget https://downloads.joomla.org/cms/joomla4/4-0-6/Joomla_4-0-6-Stable-Full_Package.zip?format=zip -O joomla.zip

Once the Joomla is downloaded then unzip the downloaded file to the Apache web root directory using the following command:

$ sudo unzip joomla.zip -d /var/www/html/example.org

set proper permission and ownership to the Joomla directory:

$ sudochown -R apache:apache /var/www/html/example.org
$ sudo chmod -R 775 /var/www/html/example.org

Create an Apache Virtual Host for Joomla

$ sudo /etc/httpd/conf.d/joomla.conf

Append the lines below.

<VirtualHost *:80>
   ServerAdmin admin@example.org
   DocumentRoot "/var/www/html/example.org"
   ServerName joomla.example.com
   ErrorLog "/var/log/httpd/example.com-error_log"
   CustomLog "/var/log/httpd/example.com-access_log" combined

<Directory "/var/www/html/example.org">
   DirectoryIndex index.html index.php
   Options FollowSymLinks
   AllowOverride All
   Require all granted
</Directory>
</VirtualHost>

Save and close the file then restart the Apache service to apply the changes:

$ sudo systemctl restart httpd

Configure Firewall

If firewalld firewall is installed on your server then you will need to allow ports 80 and 44 through the firewall. Then you can allow them by running the following command.

They are

firewall-cmd --permanent --add-service=http
firewall-cmd --permanent --add-service=https

Then, reload the firewall to apply the changes as shown below:

$ sudo firewall-cmd --reload
check the status of the Apache using the following command:
$ sudo systemctl status httpd

As a result, you can search your server IP in your browser

http://your-server-ip/

Final Look

Joomla is installed and configured. Now, open your web browser and access the Joomla web installation wizard 

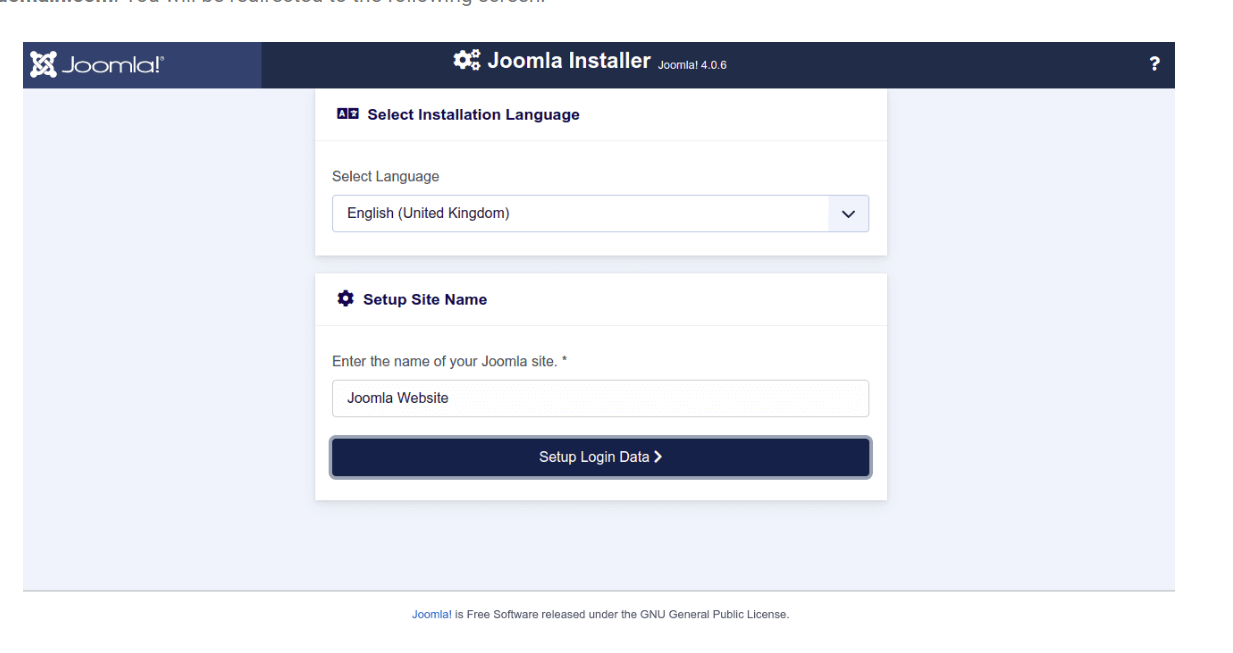
Select the language and enter the name for joomla site

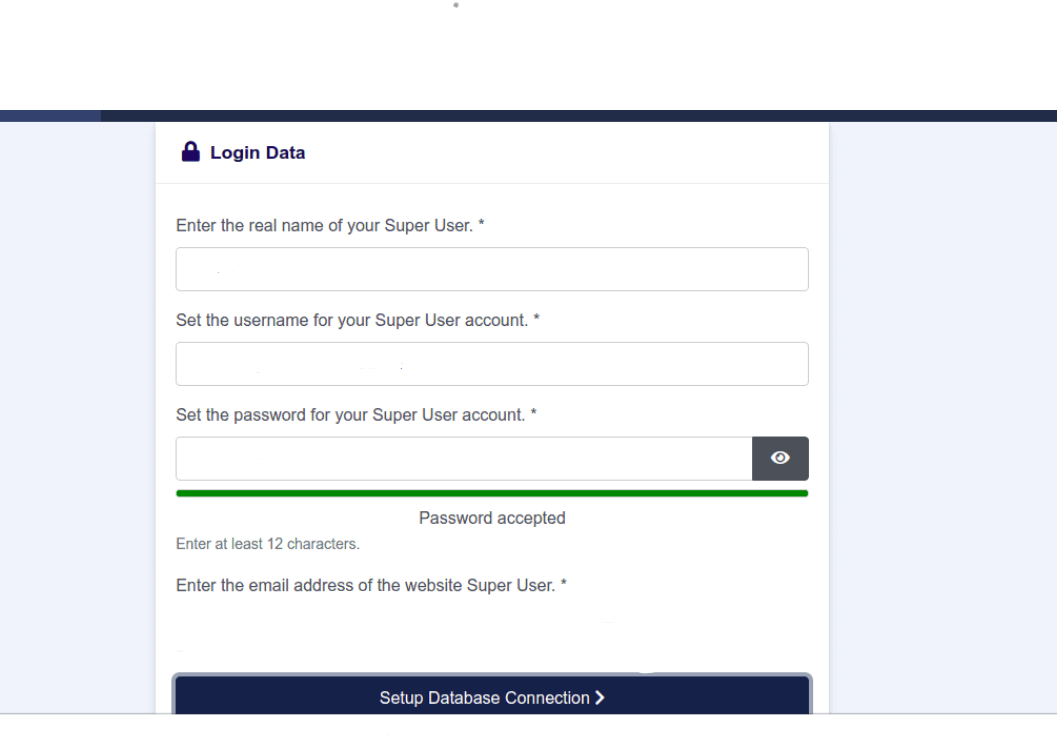
Add username, password and email id

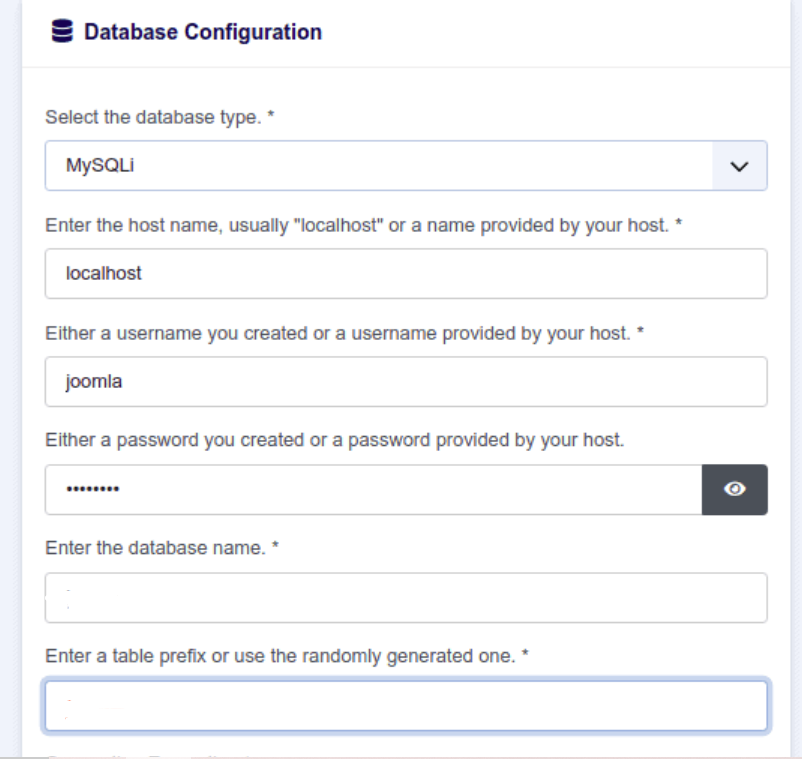
Provide your database credentials and click on the Install Joomla button.

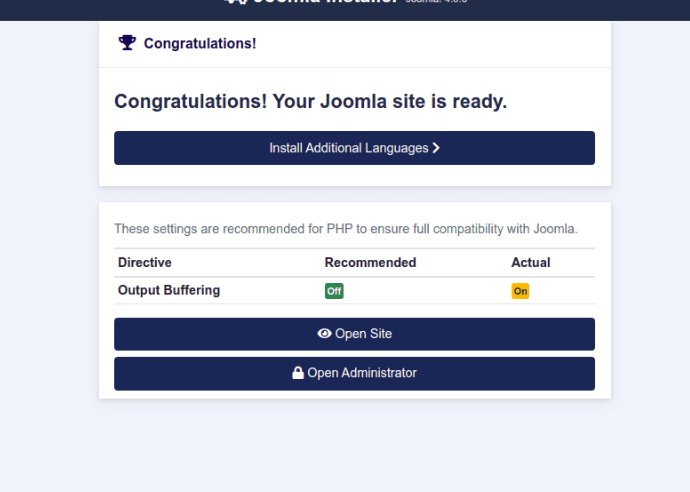
Click open administrator button

E

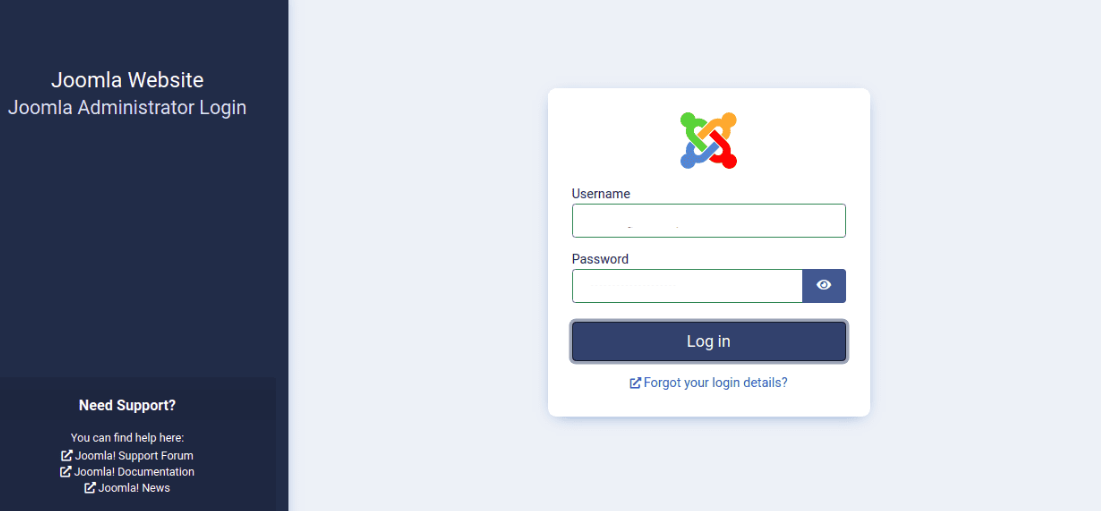
Enter username and password

Conclusion

Conclusion

By the following steps in this guide, You have learned how to Install Joomla in Centos8.


Facebook Comments