Install Let’s Encrypt for cPanel
Let’s Encrypt is a certificate authority launched on April 12, 2016. It provides free X.509 certificates for (TLS) encryption using an automated process designed to eliminate the current complex process of manual creation, installation, and renewal of certificates for secure websites.
Using Let’s Encrypt the web administrators can turn on and manage HTTPS with simple commands. Let’s Encrypt make this possible with the ACME protocol. Once we enable the Let’s Encrypt for a website, we will be able to browse our websites over https like https://example.com/. We can read more details about how the Let’s Encrypt works from the below link.
https://letsencrypt.org/how-it-works/
Let’s Encrypt for cPanel is a cPanel/WHM plugin for the Let’s Encrypt service, which provides our clients with the ability to instantly issue free trusted SSL certificates for all of their hosted domains.
Let’s Encrypt for cPanel is not a free plugin. It cost $30 on per server basis. Detailed price listing is given in the below link.
https://letsencrypt-for-cpanel.com/pricing
Installation
The plugin is distributed in RPM form as part of a yum repository for CentOS 6 and 7.
Prerequisites
- Root SSH access to server
- 64-bit CentOS 6 or 7 (5 is not supported due to lack of SNI)
- WHM 11.52 or higher (CloudLinux and LSWS compatible)
- Remote access key has been generated (
/root/.accesshash). If it is not present, simply visit the “Remote Access Key” page in WHM.
- Save our issued licence file as
/etc/letsencrypt-cpanel.licenceand chmod to 0400. - Add the letsencrypt package repository:
# cd /etc/yum.repos.d/# wget https://letsencrypt-for-cpanel.com/static/letsencrypt.repo
3. install the plugin through yum
# yum install letsencrypt-cpanel
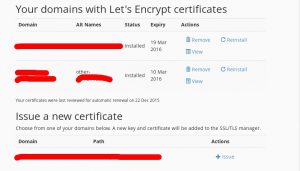
4. Once the installation completed we will see the “Let’s Encrypt SSL” icon on the home screen of cPanel. We will be able to immediately issue certificates, provided that the domain name need to point to the server itself.

